

The fastest way to make any group look good: vary heights, close gaps between people, and pick one anchor person to build the arrangement around. That’s the whole framework. Everything else is refinement.
Three poses you can call out right now, in one sentence each:
- The Stagger: “Taller people in back, shorter in front, everyone lean in slightly.” Works for 3–20 people, no props needed.
- The Huddle: “Heads together, arms around each other, look at the camera on three.” Best for 4–10 people and produces the warmest, most natural result.
- The Walk-Past: “Everyone walk toward me slowly, don’t look at the camera.” Gives you candid energy without staging chaos.
Three micro-directions to run before you press the shutter:
- Shoot from slightly above eye level (hold the camera at forehead height or use a small step stool).
- Take at least 10–20 frames per pose. Blinking and expression mismatches are fixed in post by merging the best faces from multiple frames.
- Ask everyone to step in until shoulders are touching. What feels uncomfortably close in person reads as warm and connected on camera.
Pro Tip: Before you call the first pose, spend 60 seconds just talking to the group. Loosen them up. The first frame after genuine laughter is almost always the keeper.
Key Takeaways
Vary heights, close gaps, and anchor the frame: those three moves fix the majority of group photo problems before you press the shutter.
| Point | Details |
|---|---|
| Vary heights always | Stagger seated, kneeling, and standing people so no two adjacent heads share the same level. |
| Close every gap | Ask people to move in until shoulders touch; polite spacing reads as disconnection on camera. |
| Shoot 10–20 frames per pose | Burst shooting gives you material to merge the best expressions and fix blinks in post. |
| Match aperture to group depth | Use f/5.6 or tighter for groups of 5+ so front and back rows stay in focus. |
| Anchor first, build outward | Place one person, then add the next one at a time; self-organized groups drift into flat lines. |
Pro Tip: Proximity creates psychological closeness on camera. When in doubt, ask everyone to take one more step in.
Table of Contents
- The best group photo poses you can use right now
- How to arrange groups by size
- Posing techniques and composition that change how a photo feels
- Camera settings and lighting that work for group shots
- Your on-location shoot checklist
- Common group photo problems and how to fix them fast
- Shot names and caption ideas for social sharing
- How experienced photographers direct groups and cut reshoots
- Why posing is part direction and part play
- Sources
The best group photo poses you can use right now
Varying heights, poses, and shapes is what separates a dynamic group portrait from a flat lineup. Below are 20 named poses organized by mood and occasion. Each one includes a short direction you can call out on location, a social-ready shot name, and a quick photographer hint.
Classic and compact
1. The Staircase
Direction: “Tallest in back, shortest in front, stagger left to right.”
Shot name: The Classic Stack
Caption idea: “Same crew, different heights. 🖤”
Photographer hint: Shoot at f/5.6 or tighter so front and back rows stay sharp.
2. The Anchor Cluster
Direction: “One person sits or kneels in the center, everyone else fills in around them.”
Shot name: The Inner Circle
Caption idea: “Every group has a center of gravity.”
Photographer hint: Place the anchor slightly off-center for a more natural composition.
3. The Two-Row Stack
Direction: “Back row stands, front row sits or kneels, everyone lean in slightly.”
Shot name: The Team Shot
Caption idea: “Front row energy. 🙌”
Photographer hint: Shoot from a slight elevation to see all faces clearly.
Candid and circle
4. The Huddle
Direction: “Heads together, arms around each other, look at the camera on three.”
Shot name: The Huddle Up
Caption idea: “These are my people.”
Photographer hint: Use a 35mm or 50mm lens and get close. Tight framing amplifies the warmth.
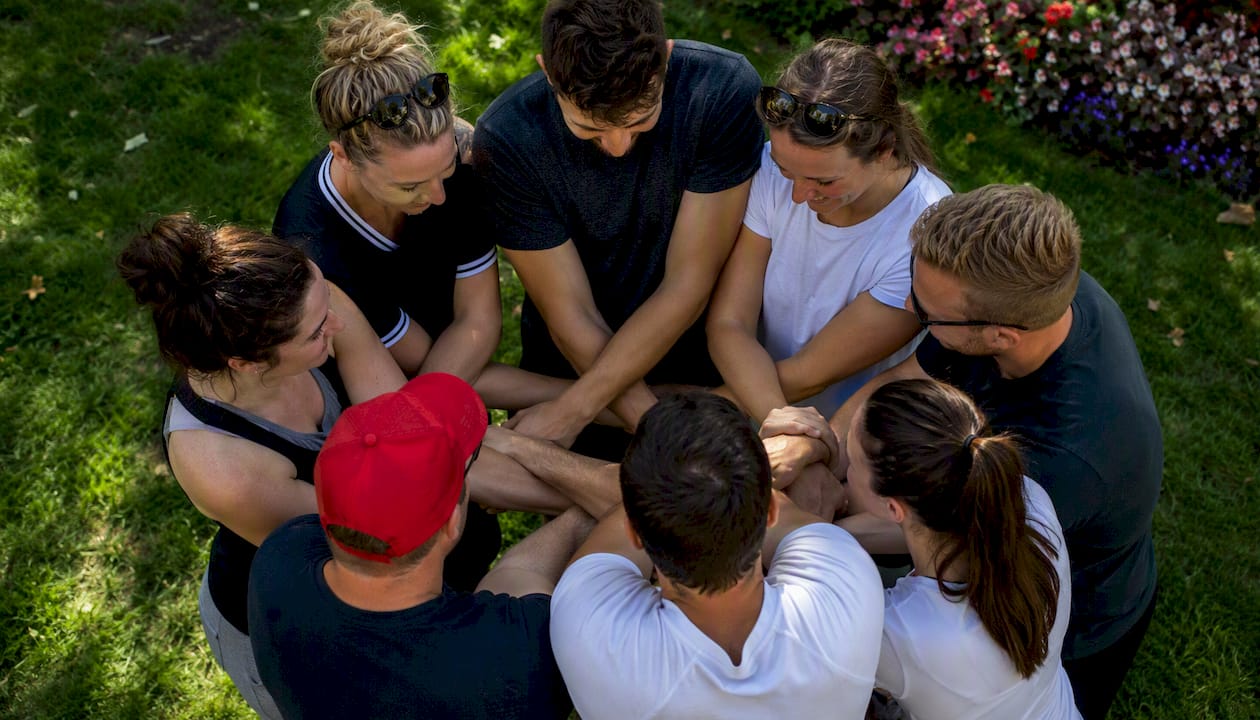
5. The Inward Circle
Direction: “Form a circle, everyone look at each other, not the camera.”
Shot name: The Inner Look
Caption idea: “The ones who get it.”
Photographer hint: Shoot from directly above (phone on a selfie stick or camera on a tall tripod) for a striking aerial perspective.
6. The Candid Laugh
Direction: “Tell me the worst joke you know. Go.”
Shot name: The Real Moment
Caption idea: “No filter needed.”
Photographer hint: Shoot in burst mode. The frame just after peak laughter is usually the best.
Dynamic and walking
7. The Walk-Past
Direction: “Everyone walk toward me slowly, talk to each other, ignore the camera.”
Shot name: The Arrival
Caption idea: “We showed up.”
Photographer hint: Use a slightly faster shutter speed (1/250s or above) to freeze natural movement cleanly.
8. The Reservoir Dogs
Direction: “Walk side by side in a line, look straight ahead, don’t smile.”
Shot name: The Strut
Caption idea: “Don’t mess with this crew.”
Photographer hint: A longer focal length (85–135mm) compresses the line and keeps everyone in frame without distortion.
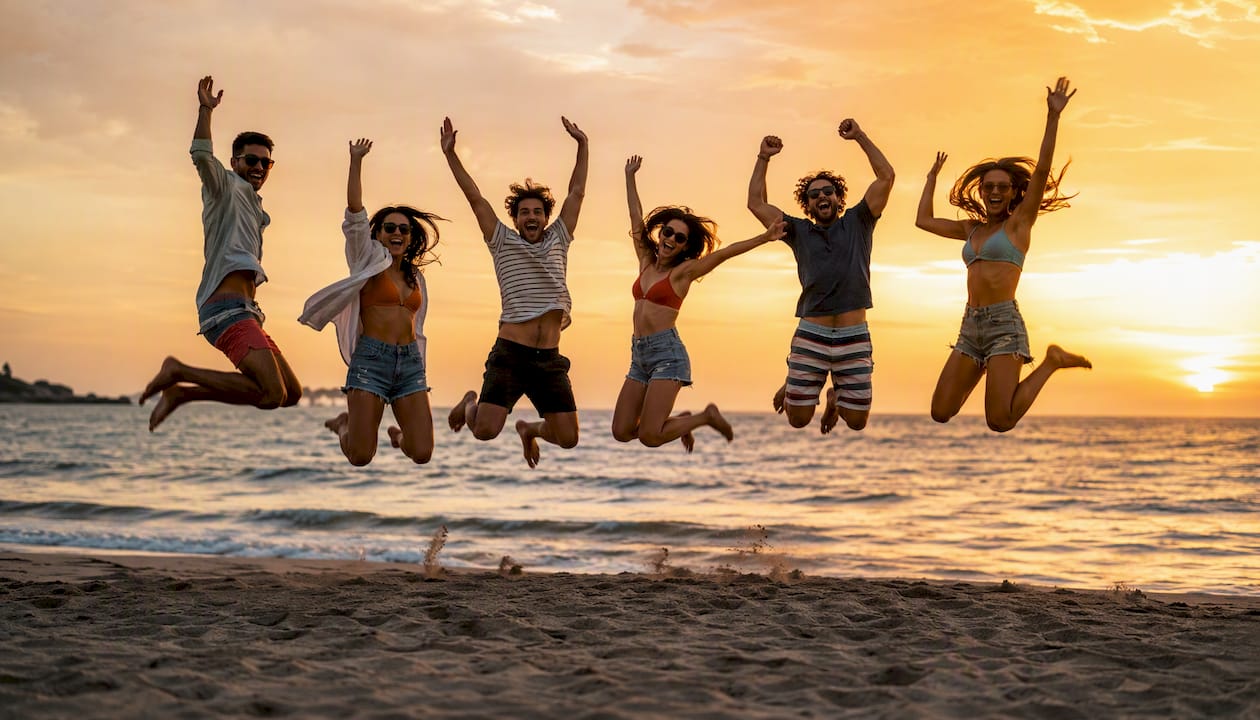
9. The Action Scatter
Direction: “Jump, spin, or do whatever feels natural when I count to three.”
Shot name: The Chaos Shot
Caption idea: “Controlled chaos. Sort of.”
Photographer hint: Burst mode at 1/500s or faster. You’ll get one usable frame in ten, and it’s worth it.
Playful and funny
10. The Piggyback
Direction: “Pair up, one person on the other’s back. Go.”
Shot name: The Lift
Caption idea: “Carrying each other since [year].”
Photographer hint: Shoot wide enough to show feet. Cropping at the knees kills the joke.
11. The Fake Argument
Direction: “Point at each other and look outraged. Really sell it.”
Shot name: The Debate
Caption idea: “We can’t agree on anything except showing up.”
Photographer hint: Capture mid-gesture. The peak of the expression is funnier than the setup.
12. The Human Pyramid
Direction: “Three people kneel, two crouch behind them, one stands in back. Hands on shoulders.”
Shot name: The Pyramid
Caption idea: “Structural integrity: questionable.”
Photographer hint: Shoot from a low angle to emphasize the height difference.
13. The Pointing Mob
Direction: “Everyone point at one person in the group. That person looks confused.”
Shot name: The Accused
Caption idea: “It was definitely them.”
Photographer hint: Make sure the “accused” person’s face is clearly visible. They’re the punchline.
Seated and relaxed
14. The Floor Scatter
Direction: “Sit however feels natural, lean on each other, no formal arrangement.”
Shot name: The Hang
Caption idea: “Sunday energy.”
Photographer hint: Shoot from a low angle or get down to their level. Shooting from above makes this feel like a surveillance photo.
15. The Bench Row
Direction: “Sit in a row, alternate which way you face, some lean forward.”
Shot name: The Lineup
Caption idea: “We take up space.”
Photographer hint: A slight diagonal angle on the bench adds depth.
16. The Stair Sit
Direction: “Use a staircase or steps. Spread out across multiple levels, some sit, some lean.”
Shot name: The Steps
Caption idea: “Every level counts.”
Photographer hint: This naturally creates tiers. Shoot straight on for symmetry or at an angle for a more editorial feel.
Editorial and strut
17. The 90210
Direction: “Arrange yourselves in a loose cluster, some standing, some leaning, some crouching. Make it look effortless.”
Shot name: The Editorial
Caption idea: “We don’t try. It just happens.”
Photographer hint: This pose works best with 5–8 people. More than that and it reads as chaos.
18. The Silhouette
Direction: “Stand in front of the light source, spread out, strike a pose.”
Shot name: The Shadow Crew
Caption idea: “The vibe speaks for itself.”
Photographer hint: Expose for the background, not the faces. The drama is in the outline.
19. The Over-the-Shoulder
Direction: “Everyone walk away from the camera, then look back over one shoulder on my count.”
Shot name: The Glance Back
Caption idea: “We’re not done yet.”
Photographer hint: Shoot at 50mm or longer. Wide lenses distort the perspective and flatten the depth.
20. The Leader Frame
Direction: “One person stands slightly in front, everyone else fans out behind them.”
Shot name: The Frontman
Caption idea: “Every crew has one.”
Photographer hint: When a photo honors a specific person (a birthday, a retirement), making them visually central and having the rest of the group look toward them rather than the camera shifts the whole mood.
Pro Tip: Coordinate wardrobe before the shoot. Ask everyone to wear one of two complementary colors and avoid busy patterns. Matching tones unify the frame without looking staged. If you’re organizing a group event, branded group shirts are an easy way to create visual cohesion instantly.
How to arrange groups by size
2–4 people
Small groups are deceptively tricky. Two people side by side with equal height and equal spacing look like a passport photo. Fix it fast:
- Pair: One person slightly in front of the other, bodies angled 45 degrees toward each other. Heads at different heights.
- Triangle (3 people): One person sits or kneels, two stand behind at slightly different heights. The triangle shape is the most stable composition in photography.
- Diamond (4 people): One person in front, two on either side slightly behind, one in back. Avoid a flat horizontal line at all costs.
For four people specifically, odd-numbered groupings and tiered arrangements produce more balanced compositions. Split four into a 1+3 or 2+2 arrangement rather than a flat row.
5–10 people
This is where most amateur photographers lose control. The solution is structure before spontaneity.
- Place your tallest person first as the anchor.
- Build out from the anchor in a slight arc or semicircle.
- Add seated or kneeling people in front to create a second tier.
- Stagger head heights so no two adjacent people are at exactly the same level.
- Close every gap. Ask people to move in until they feel slightly too close.
Odd numbers (5, 7, 9) are naturally easier to arrange than even numbers. For a group of 6 or 8, split them into subgroups of 3 and treat each subgroup as its own unit.
Pro Tip: For a semicircle arrangement, place the camera at the center of the arc. Everyone stays roughly equidistant from the lens, which means everyone stays roughly in focus at the same aperture.
Large groups (10+)
Three rows minimum. Front row sits or kneels, middle row stands, back row stands on risers, steps, or a natural elevation. Staging people in tiers and using longer focal lengths reduces distortion and keeps everyone visible.
- Use stairs, bleachers, or a natural hillside whenever possible.
- For 20+ people, shoot from an elevated position (a balcony, a ladder, or a second-floor window) to see all faces.
- An aerial circle (everyone lies on the ground, heads pointing inward, shot from directly above) works brilliantly for large groups and produces a striking, shareable image.
- For team-building or corporate group shots, pyramid and staircase arrangements communicate hierarchy and energy simultaneously.
Posing techniques and composition that change how a photo feels
The shape you arrange people into carries emotional weight before anyone even looks at the faces.
C-shape (arc or semicircle): Creates a sense of openness and inclusion. The viewer’s eye travels around the curve and lands on the center. Best for casual, warm group shots.
V-shape (chevron): Draws the eye toward the center of the frame. Works well when one person is the focal point (a birthday honoree, a team leader). The V naturally frames whoever sits at its point.
Triangle: The most stable and visually satisfying shape in photography. One person at the apex, two at the base. Reads as confident and balanced. Works for 3–5 people.
Diagonal line: A single line of people shot at an angle creates depth and movement. Pair it with a leading line in the background (a road, a fence, a row of buildings) and the composition becomes genuinely striking. Classic compositions like Lunch Atop a Skyscraper demonstrate how geometric arrangement and rhythm have always been the backbone of memorable group images.
Beyond shape, body language does most of the emotional work:
- Shoulder turns: Ask people to angle their bodies 45 degrees toward the camera rather than facing it square-on. It slims the silhouette and adds dimension.
- Head-height staggering: No two adjacent heads at the same level. Even a 2-inch difference reads clearly in a photo.
- Negative space: Leaving deliberate empty space on one side of the frame (especially in a walking or strut shot) gives the image room to breathe and suggests movement.
- Interaction over stillness: Arms around shoulders, a hand on a forearm, people leaning into each other. Touch creates visual connection. A group standing in a row with arms at their sides looks like a police lineup.
Pro Tip: Combine a C-shape arrangement with an interaction cue: “Everyone lean in and put your arm around the person next to you.” The shape gives structure; the touch gives warmth. You get both in one frame.
Camera settings and lighting that work for group shots
Focal length
The single biggest technical mistake in group photography is shooting too wide. A wide-angle lens (under 24mm on a full-frame camera, or the standard ultra-wide on most phones) distorts faces at the edges of the frame. People on the ends look stretched.
- Small groups (2–4 people): 50–85mm on a DSLR or mirrorless camera. On a phone, step back and use the 1x or 2x lens rather than the ultra-wide.
- Medium groups (5–10 people): 35–50mm on a full-frame camera. You need enough width to fit everyone without distortion.
- Large groups (10+): 24–35mm is often unavoidable, but compensate by shooting from farther back and cropping in post. For photobooth-style strips with 4+ people, the 0.5x ultra-wide lens fits everyone comfortably in the frame.
Camera settings by scenario
For groups of 5 or more, keep aperture at f/4 or tighter. A wide-open f/1.8 will put the front row in focus and blur the back row into a soft mess.
Lighting basics
- Open shade (the shadow side of a building, under a tree canopy) is the most reliable light for groups. It’s soft, even, and flattering without requiring any gear.
- Backlight with rim effect: Place the group with the sun behind them. Expose for their faces (the background will blow out slightly) and you get a warm rim of light around everyone’s hair and shoulders. Looks intentional and cinematic.
- Midday sun: Avoid shooting directly into harsh overhead light. Move the group into shade or use a reflector to bounce fill light onto faces from below.
- Indoor fill: A single off-camera flash bounced off a white ceiling or wall produces soft, even light that covers a group without harsh shadows.
Quick gear checklist for a group shoot:
- Tripod or gorilla pod (for large groups where you need to be in the shot)
- Remote shutter release or phone timer
- Reflector or white foam board (for fill light in shade)
- Extra batteries and memory cards
Your on-location shoot checklist
A two-minute prep before you start saves ten minutes of reshooting.
Pre-shoot (2 minutes)
- Scout the background. Remove clutter, check for poles or signs that will appear to grow out of someone’s head.
- Identify your anchor point (where the central person or group will stand).
- Confirm the light direction and position the group accordingly.
- Send a quick wardrobe reminder if you haven’t already. For organized group events, group chat apps make this easy to coordinate in advance.
On-shoot sequence
- Place your anchor person first.
- Build the arrangement outward, one person at a time.
- Vary heights (seated, kneeling, standing, elevated).
- Close every gap. Ask for shoulder contact.
- Set your camera (aperture, ISO, shutter speed per the table above).
- Call the pose direction clearly and calmly.
- Count down (“Three, two, one”) and shoot a burst of at least 10 frames.
- Check one frame on the screen for focus and exposure before moving on.
Timing
- Small groups (2–4 people): 2–3 minutes per pose, 3–4 poses total.
- Medium groups (5–10 people): 5–7 minutes per pose setup, 2–3 poses.
- Large groups (10+): Budget 10–15 minutes for the main arranged shot, then 5 minutes for a candid or walking variation.
Pro Tip: Keep energy high between poses. Call out something ridiculous (“Okay, now everyone do your best impression of a disappointed parent”) to get a genuine laugh, then immediately shoot. The frame right after the laugh is almost always the one you’ll use.
Common group photo problems and how to fix them fast
Stiff poses and frozen smiles
Bad version: “Okay everyone, smile!” Result: 12 people with identical forced grins.
Fix: Give them something to do. “Everyone whisper something to the person on your left.” The movement and reaction break the stiffness instantly.
Blinking
Bad version: One frame, one shot, someone always blinks.
Fix: Shoot bursts of 10–20 frames per pose. In post, merge the best open-eyed expressions from multiple frames into a single composite. Photoshop’s Auto-Align Layers makes this straightforward.
Awkward gaps between people
Bad version: People standing at polite social distance. On camera, it looks like they barely know each other.
Fix: “Step in until your shoulders are touching.” Polite physical spacing reads as disconnection in photos. What feels too close in person looks natural on screen.
Depth and focus problems
Bad version: Front row sharp, back row blurry.
Fix: Increase aperture to f/5.6 or f/8. Move the group closer together front-to-back. Shoot from slightly farther away and crop in post.
Lens distortion at the edges
Bad version: People on the far left and right of a wide-angle shot look stretched.
Fix: Use a longer focal length and step back. Place the most important people in the center of the frame. If you must use a wide lens, keep faces away from the extreme edges.
Eyes not aligned to camera
Bad version: Half the group looks at the camera, half looks at the photographer’s forehead.
Fix: Hold the camera at eye level and say “Look at the lens, not the screen.” For phone selfies, tap the lens, not the screen, so everyone knows where to look.
Uneven head heights in a row
Bad version: Everyone standing at the same height in a flat line.
Fix: Ask alternating people to shift their weight to one hip, or have every other person take a small step forward. Even a slight stagger breaks the monotony.
Shot names and caption ideas for social sharing
Playful shots
- The Chaos Jump — “We peaked here. 🎉”
- The Piggyback Parade — “Carrying each other since day one.”
- The Accused — “It was definitely them. 👆”
- The Fake Fight — “We can’t agree on anything except showing up.”
- The Pyramid — “Structural integrity: questionable.”
- The Candid Laugh — “No filter needed.”
- The Chaos Shot — “Controlled chaos. Sort of.”
Best for: Instagram Reels covers, Facebook event albums, group chat thumbnails.
Formal and team shots
- The Team Shot — “The whole crew. 📸”
- The Frontman — “Every team has one.”
- The Classic Stack — “Same crew, different heights.”
- The Lineup — “We take up space.”
- The Editorial — “We don’t try. It just happens.”
- The Steps — “Every level counts.”
Best for: LinkedIn team pages, company newsletters, event recap posts.
Editorial and mood shots
- The Strut — “Don’t mess with this crew.”
- The Arrival — “We showed up.”
- The Glance Back — “We’re not done yet.”
- The Shadow Crew — “The vibe speaks for itself.”
- The Inner Look — “The ones who get it.”
- The Hang — “Sunday energy.”
- The Real Moment — “These are my people.”
Best for: Instagram square posts, event highlight reels, printed photo books.
Usage notes:
- Call a Leader Frame (The Frontman) when the photo honors a specific person. Have the rest of the group look toward them rather than the camera for a warmer, more personal result.
- Shoot candid frames between posed shots. The transitions (people adjusting, laughing at a direction, reacting to each other) often produce the most genuine images of the session.
- For hen party themes and celebratory group events, pair playful shot names with a four-frame photobooth rhythm: calm, big, playful, editorial. Planning those four energy states in advance speeds the session and guarantees variety in the final strip.
How experienced photographers direct groups and cut reshoots
The difference between a photographer who gets 3 usable frames and one who gets 30 comes down to workflow, not luck.
Burst merging
Shoot 10–20 frames per pose. In post, select the frame with the best overall composition first, then check each face individually. If one person blinked in the hero frame but had perfect eyes in frame 7, swap them using Photoshop’s Auto-Align Layers and a layer mask. Professionals use this technique routinely for groups of 6 or more. It’s not cheating; it’s the reason large group photos look as good as they do.
Stage one person at a time
Trying to arrange 10 people simultaneously creates noise and confusion. Instead, place your anchor person first, then bring each additional person into the set one at a time and position them specifically. This approach, recommended by portrait photographers who work with large groups regularly, keeps the arrangement tight and prevents the drift that happens when people self-organize.
Voice control
Lower your voice slightly when giving directions to a large group. People lean in and pay attention. Shouting creates chaos. Give small, specific directions (“Sarah, can you tilt your head slightly left?”) rather than general ones (“Everyone look natural”). Specific directions produce specific results.
Post-session workflow
- Sort by composition first. Eliminate any frame where the arrangement is wrong before you look at faces.
- From the remaining frames, select by expression. Find the frame where the most important person looks best.
- Check every other face in that frame. If someone blinked, merge from a nearby frame.
- Deliver 3–5 final selects per pose, not 50 raw frames.
Pro Tip: For large group shoots, assign a “wrangler” — someone in the group who knows everyone and can help direct people into position. It cuts setup time in half and keeps the energy collaborative rather than chaotic.
Why posing is part direction and part play
The best group photos don’t come from perfect execution of a pose. They come from a photographer who knows the pose well enough to forget it.
When you internalize the basic framework (vary heights, close gaps, anchor the frame), you stop thinking about the mechanics and start reading the group’s energy. Some groups need structure; they’ll stand there frozen until you give them a specific direction. Others need permission to be themselves; your job is to set the shape and then get out of the way.
A two-minute test shoot at the start of any session tells you which type you’re working with. Call one simple pose, shoot 10 frames, and watch how the group responds. If they relax and start joking around, lean into the candid approach. If they stiffen and wait for your next instruction, give them more structure and more specific directions.
The checklist in this article is a starting point, not a script. Document one pose that works for your regular group (a recurring team, a family, a tour group) and reuse it as your baseline. Build from there. The groups that look most natural in photos are usually the ones whose photographer has shot them before and knows exactly where to put everyone.
For groups on a Pedalpowergalway tour, the bikes themselves solve half the posing problem. Everyone’s already seated, already close together, already in a natural arrangement. The photographer’s job is to find the angle, close the gaps, and shoot bursts.

Sources
Short list of high-value references for photographers who want to go deeper:
- How to Pose Groups for Portrait Photography
- Gostudio
- Group Photo Poses: 15 Ideas for 3+ People — PoseOverlay
- Best Group Photo Poses for Photobooth Strips — 12 Ideas That Always Work | PolaroidCam Blog